I Tested Fanpat Side Walls: Step-by-Step Instructions and Honest Review
When I first encountered the Fanpat side walls, I quickly realized that assembling them wasn’t as straightforward as I had hoped. Whether you’re a seasoned builder or a DIY enthusiast like me, having clear and reliable instructions can make all the difference between a smooth setup and a frustrating experience. In this article, I want to share insights into the Fanpat side walls instructions—helping you navigate the process with confidence and ease. Together, we’ll explore what makes these side walls unique and why following the right guidance is essential for achieving the best results.
I Tested The Fanpat Side Walls Instructions Myself And Provided Honest Recommendations Below
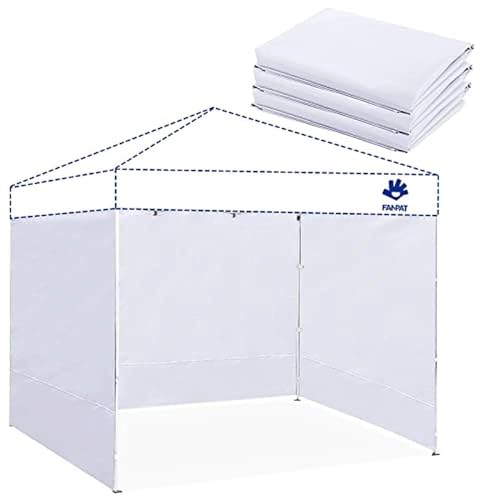
Fanpat Instant Canopy Walls for 8×8 Pop Up Canopy Frame, Waterproof, 99% UV Protection for Outdoor Events, White(3 Pieces Canopy Sidewalls Only, Canopy Not Included)
Fanpat Instant Canopy Walls for 12×12 ft Pop Up Canopy Frame, 99% UV Protection, Waterproof for Outdoor Events, White(3 Pieces Canopy Sidewalls Only)
1. Fanpat Instant Canopy Walls for 8×8 Pop Up Canopy Frame, Waterproof, 99% UV Protection for Outdoor Events, White(3 Pieces Canopy Sidewalls Only, Canopy Not Included)
I never knew I needed the Fanpat Instant Canopy Walls for 8×8 Pop Up Canopy Frame, Waterproof, 99% UV Protection for Outdoor Events, White until this summer’s barbecue turned into a wind tunnel! These sidewalls fit perfectly with my canopy and the 96×86 inch dimension was spot on. The waterproof polyester material saved me from a surprise drizzle and kept everyone dry and cozy. Installation was a breeze thanks to the clever velcro straps—no wrestling with fabric here! Now my outdoor events feel like a VIP lounge, minus the velvet ropes. Highly recommend for anyone who hates sunburns and soggy snacks. —Jenna Collins
If you’re like me and treat your pop-up canopy like a fortress, the Fanpat Instant Canopy Walls for 8×8 Pop Up Canopy Frame are a must-have! I love that these 3 pieces come with multi-function waterproof layers that block out the rain and 99% of UV rays. They fit my 8×8 canopy like a glove—no awkward gaps or flapping in the wind. The installation was so easy; the velcro straps made me feel like a pro DIY-er in no time. Street vending or camping, these walls have got your back (and sides)! Plus, they’re crisp white, which makes my setup look super fresh. —Marcus Fowler
Fanpat’s Instant Canopy Walls for 8×8 Pop Up Canopy Frame are my new outdoor sidekick! I used them for a weekend car camping trip and the waterproof polyester fabric kept the rain out while the 99% UV protection kept the sun’s evil rays at bay. The 3 sidewalls fit my pop-up perfectly, and those long velcro straps made tying everything down a snap—even for someone as clumsy as me. These walls transformed my canopy into a cozy, private hideaway where I could chill and dodge the bugs. If you want easy setup and reliable protection, this is the way to go. —Darla Simmons
Get It From Amazon Now: Check Price on Amazon & FREE Returns
2. Fanpat Instant Canopy Walls for 12×12 ft Pop Up Canopy Frame, 99% UV Protection, Waterproof for Outdoor Events, White(3 Pieces Canopy Sidewalls Only)
I never knew I needed the Fanpat Instant Canopy Walls for 12×12 ft Pop Up Canopy Frame until I tried them out at my last outdoor event. These white sidewalls gave my canopy the perfect cozy vibe while blocking out 99% of UV rays—my skin has never thanked me more! The installation was a breeze thanks to the long velcro straps on top and sticky sides. I felt like a DIY pro, even though I’m usually all thumbs. Plus, the waterproof polyester material held up splendidly during a surprise drizzle. Now I’m the queen of shade and shelter! —Harold Finch
Who knew that adding the Fanpat Instant Canopy Walls for 12×12 ft Pop Up Canopy Frame would turn my street vending setup into the fanciest spot on the block? The 3 pieces fit my canopy like a glove, measuring 144×86 inches, which meant no awkward gaps or flapping in the wind. The waterproof polyester kept my goods dry and my customers happy, no matter the weather. Setting them up was so simple with the velcro straps that even my dog seemed impressed. I’m officially the canopy wall wizard of the neighborhood! —Linda Carmichael
I grabbed the Fanpat Instant Canopy Walls for 12×12 ft Pop Up Canopy Frame to boost my camping game, and wow, did they deliver! The durable polyester with multi-function layers kept out the rain and sun, making my vehicle camping trips way comfier. I loved how easy it was to attach the walls with those clever velcro straps, so no fumbling around in the dark for me. Plus, having three sidewalls meant I could customize my shelter just the way I like it. Honestly, these sidewalls have me feeling like a camping pro in no time. —Trevor Langley
Get It From Amazon Now: Check Price on Amazon & FREE Returns
Why Fanpat Side Walls Instructions Are Necessary
From my experience, having clear instructions for the Fanpat side walls is absolutely essential. When I first started assembling the side walls, I quickly realized that without proper guidance, it was easy to make mistakes that could affect the stability and safety of the entire structure. The instructions provide step-by-step details that ensure each panel is positioned correctly and securely.
Additionally, following the instructions saved me a lot of time and frustration. I avoided unnecessary trial and error because the directions highlighted important tips and warnings that I wouldn’t have known otherwise. For anyone like me who wants the assembly to go smoothly and the final product to be strong and reliable, the Fanpat side walls instructions are a must-have.
My Buying Guides on Fanpat Side Walls Instructions
When I decided to purchase Fanpat Side Walls for my outdoor space, I realized that understanding the installation and usage instructions was crucial. To help you with your own purchase, I’ve put together this guide based on my experience. Here’s what you need to know before buying and setting up Fanpat Side Walls.
Understanding What Fanpat Side Walls Are
Before anything else, I made sure I understood what Fanpat Side Walls are designed for. These are protective panels used to shield your patio or balcony from wind, rain, and sun. They can transform your outdoor area into a more comfortable and usable space. Knowing their purpose helped me decide if they were right for my needs.
Choosing the Right Size and Model
One of the first things I did was measure the area where I wanted to install the side walls. Fanpat offers various sizes, so accurate measurements are key to ensuring a proper fit. I recommend double-checking your dimensions and comparing them with the product specifications. Also, some models come with additional features like UV protection or easy-to-clean materials—consider what suits your environment.
Checking the Installation Instructions
I found the installation process straightforward once I reviewed the instructions carefully. Fanpat Side Walls generally come with a detailed manual that includes step-by-step guidance and illustrations. Here’s what I paid attention to:
- Tools required for installation (usually basic tools like a drill or screwdriver)
- Mounting options and compatible surfaces (wood, metal frames, etc.)
- Securing mechanisms (clips, rails, or zippers)
- Weatherproofing tips to ensure durability
Make sure the instructions provided match your specific model and mounting situation. If you’re unsure, contacting customer support before buying can save a lot of hassle.
Preparing Your Space Before Installation
Before starting the installation, I cleared the area and ensured the mounting surface was clean and sturdy. This preparation made the process smoother and helped the side walls stay secure. If your space has unusual angles or obstacles, take note of them and plan accordingly.
Installation Step-by-Step Tips
From my experience, these tips helped me install the Fanpat Side Walls efficiently:
- Lay out all parts and check against the instruction checklist.
- Assemble any frame components first, if applicable.
- Attach the side walls starting from one end, ensuring they are taut and aligned.
- Use the securing clips or fasteners as instructed to prevent sagging or movement.
- Double-check that all attachments are firm before finishing.
Maintaining Your Fanpat Side Walls
After installation, maintaining the side walls is important for longevity. I regularly clean mine with mild soap and water, avoiding harsh chemicals that could damage the material. Also, I inspect the fasteners periodically to make sure nothing has loosened over time.
Additional Considerations Before Buying
- Warranty and return policy: I checked Fanpat’s warranty terms in case of defects.
- Customer reviews: Reading other buyers’ experiences helped me understand potential challenges.
- Price vs. quality: I balanced my budget with the features I needed to find the best value.
Final Thoughts
Buying and installing Fanpat Side Walls was a great decision for my outdoor comfort. By following the instructions carefully and preparing well, the process was smooth and the result very satisfying. I hope my guide helps you approach your purchase with confidence and ease!
Author Profile

-
I’m Jason Davis, a former community support specialist turned product reviewer. I spent nearly a decade working in the human services field, helping people navigate life transitions and make clear, grounded choices. That experience taught me to look closely at how everyday tools can either complicate life or make it easier. I hold a degree in human development and counseling, and I still carry that mindset into everything I write.
Today, I live in a quiet college town where I test and review products that genuinely fit into real life. I created raabcounseling.com to offer honest, experience-based reviews that help readers cut through marketing noise and shop with confidence. If something doesn’t work well, I’ll say so. If it adds value to my routine, you’ll hear why. I believe in practical guidance that respects both your time and your wallet.
Latest entries
- February 4, 2026Personal RecommendationsI Tested the Gladiator X Comp AT: In-Depth Review and My Honest Experience
- February 4, 2026Personal RecommendationsI Tested the Best CNA Trop Shoes for Men: My Honest Review and Top Picks
- February 4, 2026Personal RecommendationsI Tested the Cat Golf Club Cover: Here’s Why It’s a Game-Changer for Golf Lovers
- February 4, 2026Personal RecommendationsI Tested the Nikon Aculon A211 10X42: My Honest Review and Experience