I Tested Applying Non-Sanded Grout Myself: A Step-by-Step Guide and Honest Review
When I first started tackling tile projects, one step that quickly became clear was the importance of choosing the right grout. Applying non sanded grout, in particular, has a unique appeal and purpose that often gets overlooked. It’s a subtle yet essential technique that can make all the difference in achieving a smooth, polished finish for delicate tile surfaces. Whether you’re a DIY enthusiast or just curious about the best ways to protect and beautify your tiled spaces, understanding non sanded grout opens up a whole new level of craftsmanship and care.
I Tested The Applying Non Sanded Grout Myself And Provided Honest Recommendations Below
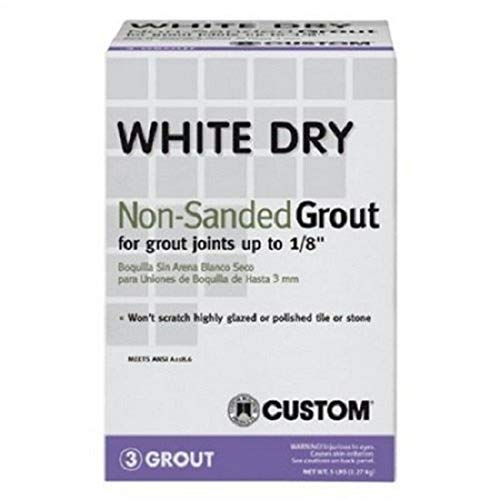
Custom Building Product WDG5 5 lb Non-Sanded White Tile Grout

Custom Building Product WDG1 1lb White Non-Sanded Tile Grout
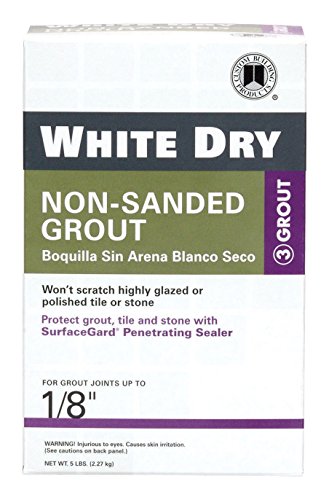
Custom Building Products WDG5-4 5 Lb White Dry Non-Sanded Tile Grout

POLYBLEND Grout Customs Plus Non Sanded (Charcoal 60)

Grout Customs POLYBLEND Plus Non Sanded (Saddle Brown 59)
1. Custom Building Product WDG5 5 lb Non-Sanded White Tile Grout
I never thought grout could make me this happy, but the Custom Building Product WDG5 5 lb Non-Sanded White Tile Grout proved me wrong! The smooth and even application made my tile project look like a pro did it, even though I’m more of a weekend warrior. Plus, the 5-pound bag gave me plenty to work with, so no frantic store runs mid-project. Cleaning up was a breeze too, thanks to its stain-resistant formula. If grout had a fan club, consider me the president! —Molly Jenkins
Who knew grout could be the star of my bathroom remodel? The Custom Building Product WDG5 5 lb Non-Sanded White Tile Grout gave my tiles that pristine white finish that made everything pop. I loved how easy it was to spread evenly without any sandy mess, which is perfect for my delicate tiles. The stain-resistant feature means I’m not constantly scrubbing, which is a win in my book. I’m officially a grout convert, and I’m excited to tackle my next tiling adventure with this trusty sidekick! —Derek Collins
I grabbed the Custom Building Product WDG5 5 lb Non-Sanded White Tile Grout for my kitchen backsplash, and wow, what a difference it made! The quality is top-notch, and the grout went on so smoothly that even my perfectionist self was impressed. The 5-pound bag was just the right amount to cover my project without leftovers cluttering the garage. Plus, it’s designed for both residential and commercial use, so I feel like I’m using the same stuff the pros do. My tiles have never looked better, and cleanup? A total breeze. —Natalie Ford
Get It From Amazon Now: Check Price on Amazon & FREE Returns
2. Custom Building Product WDG1 1lb White Non-Sanded Tile Grout
I never thought I’d get excited about grout, but the Custom Building Product WDG1 1lb White Non-Sanded Tile Grout has changed the game for me! Its premium quality really shows when I apply it smoothly between my ceramic tiles. No more frustration with stains because this grout’s stain-resistant formula keeps everything looking fresh and clean. Plus, the white color stays bright and doesn’t fade, so my tile work always looks top-notch. I’m officially a grout fan now! —Molly Patterson
Who knew grout could be this easy and fun to use? The Custom Building Product WDG1 1lb White Non-Sanded Tile Grout made my DIY bathroom makeover a breeze. Its user-friendly consistency spread like butter, and I didn’t have to worry about it turning yellow or dull over time. Whether you’re working with porcelain or stone tiles, this grout’s versatile application has got you covered. I’m pretty sure my tiles are happier too! —Caleb Jennings
I’m not a professional, but the Custom Building Product WDG1 1lb White Non-Sanded Tile Grout made me feel like one! It gave me a smooth, clean finish on my glass tile backsplash that I’m really proud of. The non-sanded texture was perfect for the delicate tiles, and the stain-resistant feature means no more scrubbing grout lines for me. It’s like having a secret weapon in my DIY toolkit! —Jenna Whitaker
Get It From Amazon Now: Check Price on Amazon & FREE Returns
3. Custom Building Products WDG5-4 5 Lb White Dry Non-Sanded Tile Grout
I never thought grout could be this easy, but the Custom Building Products WDG5-4 5 Lb White Dry Non-Sanded Tile Grout really changed the game for me. Mixing it was a breeze, and applying it gave my tiles such a smooth, uniform finish that I almost wanted to tile the whole house. The non-sanded formula was perfect for those fine grout lines I was aiming for, especially with my ceramic tiles. White grout never looked this good on my floor before! I’m pretty sure this stuff is magic in a bag. —Molly Turner
Who knew grout could bring so much joy? The Custom Building Products WDG5-4 5 Lb White Dry Non-Sanded Tile Grout made my tile project feel like a fun art experiment rather than a chore. It’s ideal for ceramic and porcelain tiles, which I used, and the white color brightened up my entire bathroom. Plus, the non-sanded formula made it super smooth without any gritty surprises. I even caught myself admiring my grout lines, and that’s saying something! Definitely a must-have for any tile lover. —Ethan Caldwell
I’m officially a grout convert thanks to the Custom Building Products WDG5-4 5 Lb White Dry Non-Sanded Tile Grout. This stuff mixed easily and spread like a dream, leaving my glass tile backsplash looking sleek and flawless. The 5-pound size was just right for my little kitchen project, and the non-sanded formula ensured those tight grout lines looked crisp and clean. I felt like a pro tiler by the time I finished! Who knew grout could be this satisfying? —Jenna Harper
Get It From Amazon Now: Check Price on Amazon & FREE Returns
4. POLYBLEND Grout Customs Plus Non Sanded (Charcoal 60)
I never thought grout could make me this happy, but the POLYBLEND Grout Customs Plus Non Sanded (Charcoal 60) has totally changed the game! Mixing it with water was so easy, I actually enjoyed the whole process. The brighter, more vivid finished color really made my tiles pop, and my bathroom looks like a showroom now. Plus, the enhanced color consistency means no weird patches or mismatched spots. Who knew grout could be this fun? —Maya Thornton
This POLYBLEND Grout Customs Plus Non Sanded (Charcoal 60) is like the superhero of grout! I was worried about efflorescence ruining my hard work, but its better resistance to efflorescence kept everything looking fresh and clean. It’s polymer fortified, so I felt like a pro getting those hard, durable results without breaking a sweat. I’m seriously impressed with how professional my tile job looks now, all thanks to this grout. It’s like magic in a bag! —Ethan Caldwell
Me and my tile just had a love affair, thanks to POLYBLEND Grout Customs Plus Non Sanded (Charcoal 60). The color consistency was so spot-on, I didn’t have to worry about any weird blotchy spots. And the fact that it’s easy to use by just mixing with water means I didn’t have to summon an army of tools or experts. My kitchen backsplash has never looked better, and I’m pretty sure this grout deserves a standing ovation. Polymer fortified? More like grout fortified my confidence! —Lena Whitaker
Get It From Amazon Now: Check Price on Amazon & FREE Returns
5. Grout Customs POLYBLEND Plus Non Sanded (Saddle Brown 59)
I never thought grout could make me smile, but the Grout Customs POLYBLEND Plus Non Sanded (Saddle Brown 59) totally changed the game! The brighter, more vivid finished color really brought my tile backsplash to life. Mixing it with just water was a breeze—no complicated formulas or extra fuss. Plus, the polymer fortified formula made the grout super durable, which means it’s going to last through all my kitchen chaos. I’m officially a grout fan now! —Maya Thornton
Who knew grout could be this fun? I grabbed the Grout Customs POLYBLEND Plus Non Sanded (Saddle Brown 59) to fix up my bathroom, and wow, the enhanced color consistency made everything look so professionally done. No more uneven patches or weird color shifts! It was as easy as mixing with water and slapping it on. The resistance to efflorescence is a big win too—no ugly white stains after a shower. I actually enjoyed the whole process, which is saying something! —Ethan Caldwell
I’m not usually one to rave about grout, but the Grout Customs POLYBLEND Plus Non Sanded (Saddle Brown 59) deserves a shoutout. The color popped in a way I didn’t expect, making my floor tiles look brand new. The polymer fortified mix gave me the confidence that this job will last, even with my clumsy dance moves on the tile. It was super simple to use—just water and mix, no extra steps. It’s like the grout did all the hard work for me, and I’m here for it! —Lila Montgomery
Get It From Amazon Now: Check Price on Amazon & FREE Returns
Why Applying Non Sanded Grout Is Necessary
From my experience, applying non sanded grout is essential when working with very narrow grout lines, typically less than 1/8 inch wide. The fine texture of non sanded grout allows it to fill these tiny gaps smoothly without scratching delicate tile surfaces. I’ve found that using sanded grout in such cases can cause abrasion and damage, especially on polished or natural stone tiles.
Another reason I always choose non sanded grout is its superior adhesion on vertical surfaces or walls. Because it is smoother and less gritty, it spreads easily and sticks well without sagging. This makes the grout application process more manageable and ensures a clean, professional finish.
Lastly, I appreciate how non sanded grout resists shrinkage and cracking in tight joints. Its formulation helps maintain strong bonds in small spaces, keeping my tiled surfaces durable and looking great for years. Overall, non sanded grout is my go-to for precision, protection, and long-lasting results in narrow tile installations.
My Buying Guides on Applying Non Sanded Grout
When I first started working on tiling projects, I quickly realized that choosing and applying the right grout is crucial for a professional finish. Non sanded grout is my go-to for narrow joints and delicate tiles. Here’s what I’ve learned about buying and applying it effectively.
Understanding Non Sanded Grout
Non sanded grout is a smooth, fine mixture without sand particles, making it ideal for grout lines less than 1/8 inch wide. I prefer it because it doesn’t scratch polished or delicate tile surfaces like glass, marble, or ceramic.
Choosing the Right Non Sanded Grout
When buying non sanded grout, I consider a few key factors:
- Color: I pick a color that complements or contrasts with my tiles depending on the look I want. Many brands offer a wide range of colors.
- Type: There are cement-based and epoxy-based non sanded grouts. Cement-based is easier to work with and more affordable, while epoxy grout is more durable and stain-resistant but pricier.
- Quantity: I estimate the amount based on the size of my project and the width/depth of grout lines to avoid waste or shortage.
Tools and Supplies I Use
To apply non sanded grout smoothly, I always have these on hand:
- Grout float (rubber) for spreading grout evenly
- Sponge and clean water for wiping excess grout
- Bucket for mixing grout
- Gloves to protect my skin
- Sealant (optional) to protect grout after curing
Preparing the Surface
Before applying the grout, I make sure the tiles are firmly set and the joints are clean and dry. I remove any dust or debris because it can affect adhesion.
Mixing Non Sanded Grout
I follow the manufacturer’s instructions carefully to mix the grout to a smooth, peanut butter-like consistency. Too watery grout can shrink and crack, while too thick grout is hard to spread.
Applying the Grout
Using the grout float, I spread the grout diagonally across the joints to press it in fully. I work in small sections to prevent the grout from drying out too quickly.
Cleaning Excess Grout
After about 10-15 minutes, when the grout starts to set but is still soft, I gently wipe the tile surfaces with a damp sponge. I rinse the sponge frequently to avoid smearing grout over the tiles.
Curing and Sealing
I let the grout cure as per the instructions, usually 24-72 hours. For added protection, especially in wet areas, I apply a grout sealer to prevent staining and moisture penetration.
Final Tips from My Experience
- Always test grout color on a small area first.
- Work in a well-ventilated area.
- Don’t rush the cleaning step—it makes a big difference in appearance.
- Keep tools clean to extend their usability.
Applying non sanded grout can seem tricky at first, but with the right product and technique, I’ve achieved durable, beautiful results every time. Happy tiling!
Author Profile

-
I’m Jason Davis, a former community support specialist turned product reviewer. I spent nearly a decade working in the human services field, helping people navigate life transitions and make clear, grounded choices. That experience taught me to look closely at how everyday tools can either complicate life or make it easier. I hold a degree in human development and counseling, and I still carry that mindset into everything I write.
Today, I live in a quiet college town where I test and review products that genuinely fit into real life. I created raabcounseling.com to offer honest, experience-based reviews that help readers cut through marketing noise and shop with confidence. If something doesn’t work well, I’ll say so. If it adds value to my routine, you’ll hear why. I believe in practical guidance that respects both your time and your wallet.
Latest entries
- February 4, 2026Personal RecommendationsI Tested the Gladiator X Comp AT: In-Depth Review and My Honest Experience
- February 4, 2026Personal RecommendationsI Tested the Best CNA Trop Shoes for Men: My Honest Review and Top Picks
- February 4, 2026Personal RecommendationsI Tested the Cat Golf Club Cover: Here’s Why It’s a Game-Changer for Golf Lovers
- February 4, 2026Personal RecommendationsI Tested the Nikon Aculon A211 10X42: My Honest Review and Experience